I remember my first multi-day camping trip. I packed earrings, necklaces, even a chunky bracelet. By day two, everything tangled in my pack, snagged on branches, and weighed me down. I looked ridiculous next to everyone in practical gear.
It hit me: accessories should support the trip, not steal the show.
Now, I keep it to a few pieces that feel right. No more hassle. Just calm, put-together days outdoors.
How To Accessorize Camping Outfits Without Overdoing It
This guide shows you how to add just enough accessories to your camping outfits for a pulled-together look that stays comfortable. You'll end up with outfits that move with you, handle dirt and weather, and don't clutter your pack. It's simple, and it works every time I head out.
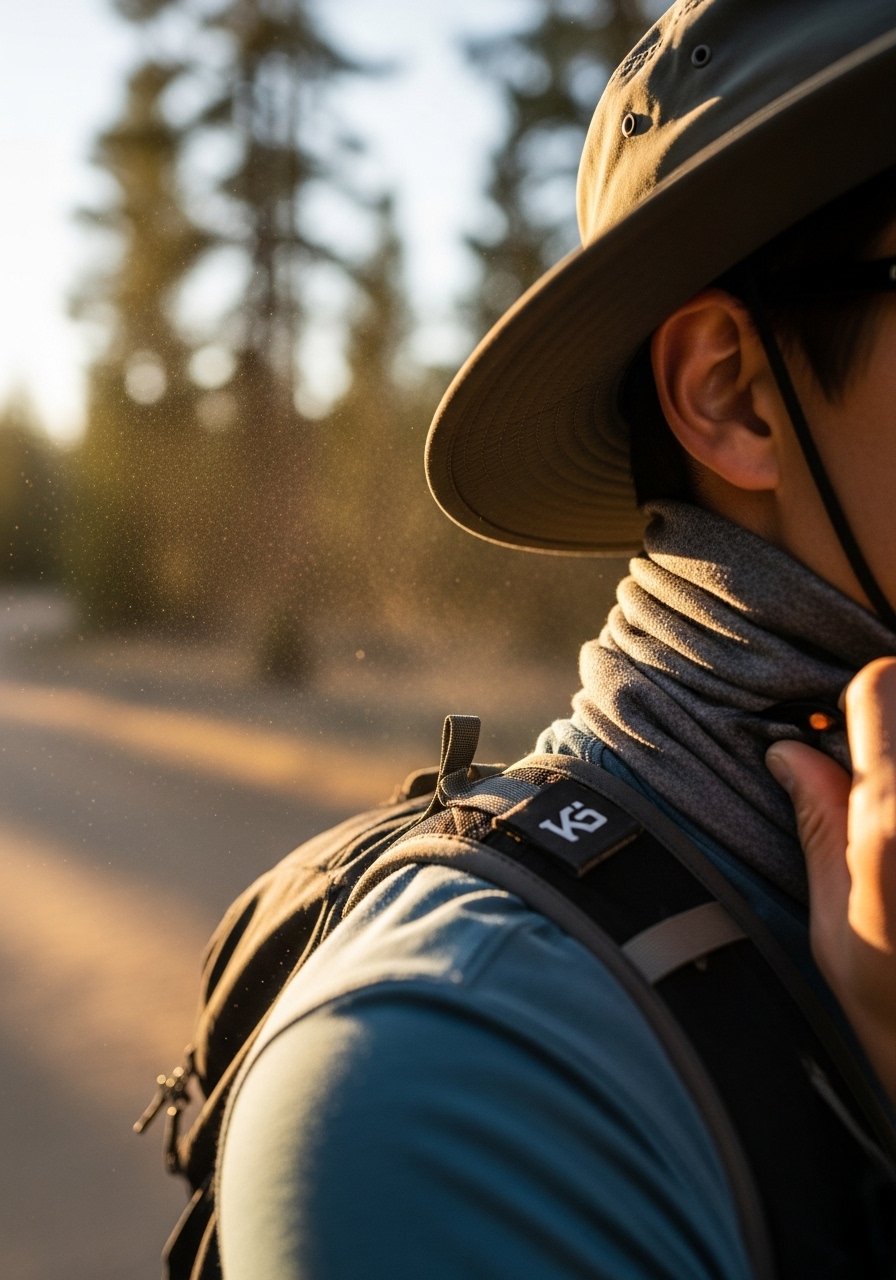
What You’ll Need
- [Quick-dry bandana in neutral earth tones](https://www.amazon.com/s?k=quick+dry+bandana+earth+tones&tag={{flowpinsystem-20}}
- [Packable wide-brim sun hat in canvas, olive green](https://www.amazon.com/s?k=packable+wide+brim+sun+hat+canvas+olive+green&tag={{flowpinsystem-20}}
- [Leather belt with bottle opener buckle, brown](https://www.amazon.com/s?k=leather+belt+bottle+opener+buckle+brown&tag={{flowpinsystem-20}}
- [Lightweight wool beanie, gray](https://www.amazon.com/s?k=lightweight+wool+beanie+gray&tag={{flowpinsystem-20}}
- [Rugged canvas watch with compass, black strap](https://www.amazon.com/s?k=rugged+canvas+watch+compass+black+strap&tag={{flowpinsystem-20}}
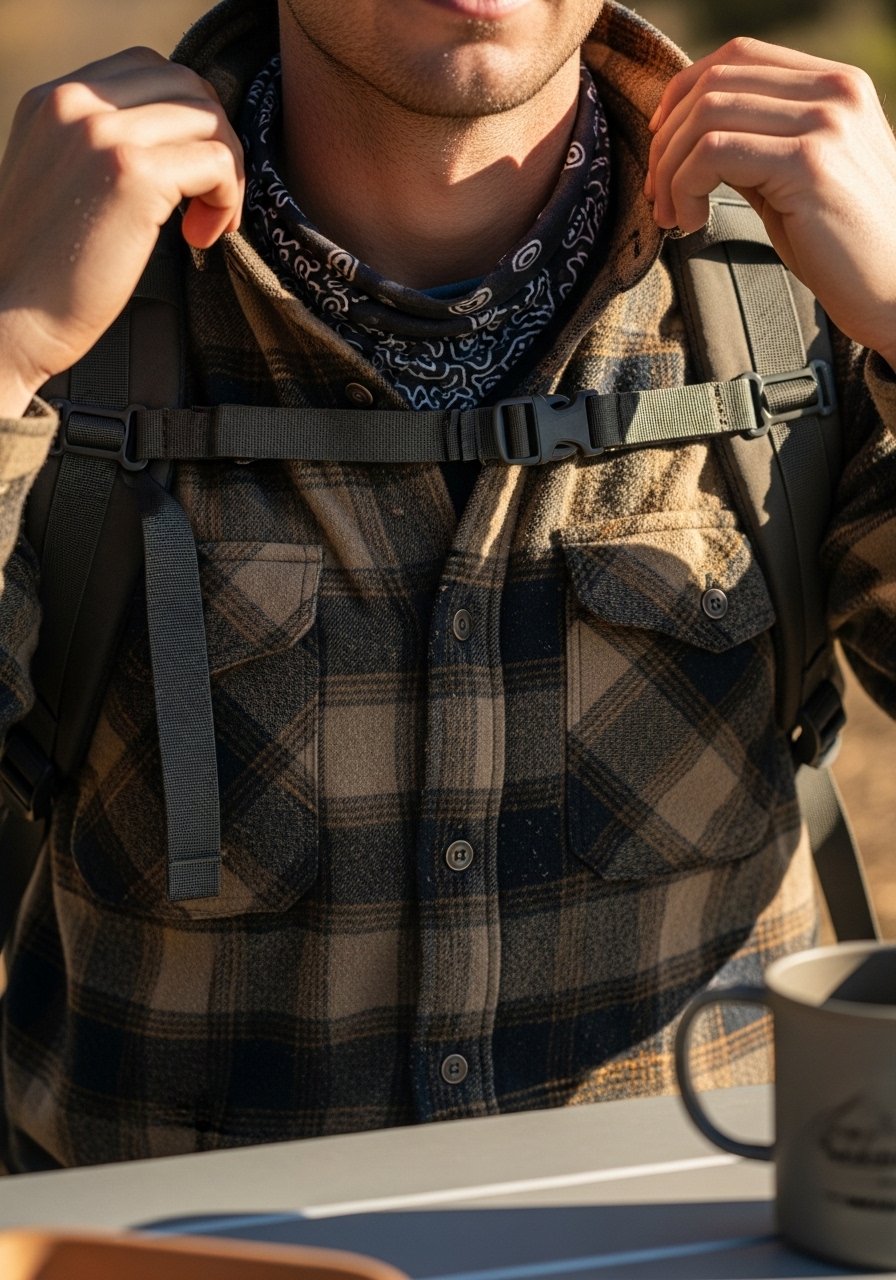
- [Merino wool buff neck gaiter, multi-cam pattern](https://www.amazon.com/s?k=merino+wool+buff+neck+gaiter+multi+cam&tag={{flowpinsystem-20}}
- [Trail-ready sunglasses with cord, polarized lenses](https://www.amazon.com/s?k=trail+sunglasses+polarized+lenses+with+cord&tag={{flowpinsystem-20}}
- [Durable enamel pin set for hats, nature motifs](https://www.amazon.com/s?k=durable+enamel+pin+set+hat+pins+nature&tag={{flowpinsystem-20}}
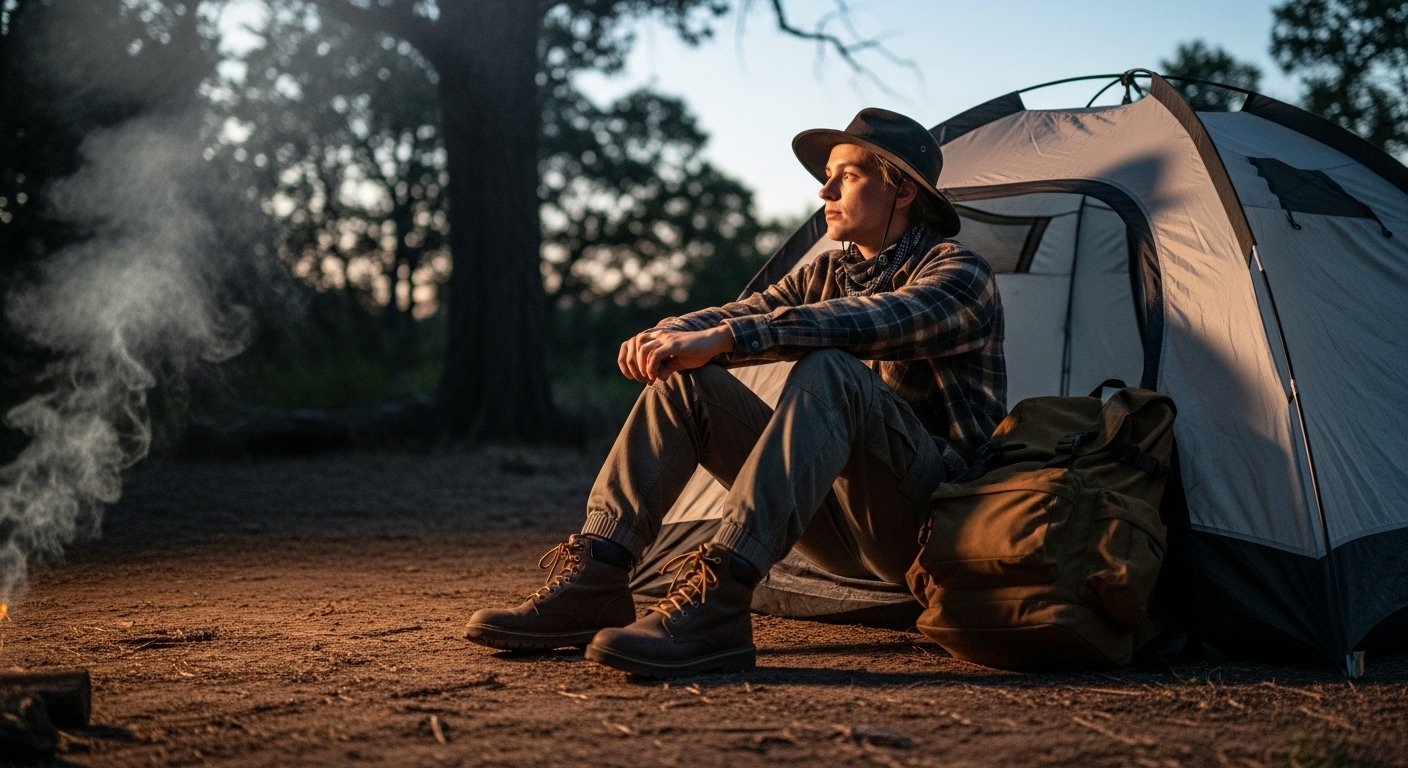
Step 1: Build from Your Base Layers
I start with my base—long-sleeve shirt, pants, sturdy boots. These handle the basics: moisture, thorns, sitting on logs. Why? They set the tone for everything else.
Adding one accessory here changes the feel instantly. A bandana at the neck keeps it neat without bulk.
People miss how base layers dictate limits—skip this, and accessories flop. Avoid piling on early; pick one that ties colors together.
It feels balanced right away. Ready for the trail.
Step 2: Match Accessories to the Day's Demands

I look outside first. Hot sun? Hat and sunglasses. Chilly dawn? Beanie or buff. This keeps choices practical.
Practically, it shifts your comfort—head stays protected, neck warmed. No distractions.
Most overlook weather shifts; one layer too much ruins the hike. Don't grab shiny extras; stick to function.
Now the outfit flows with the rhythm of camp life.
Step 3: Layer Sparingly for Function
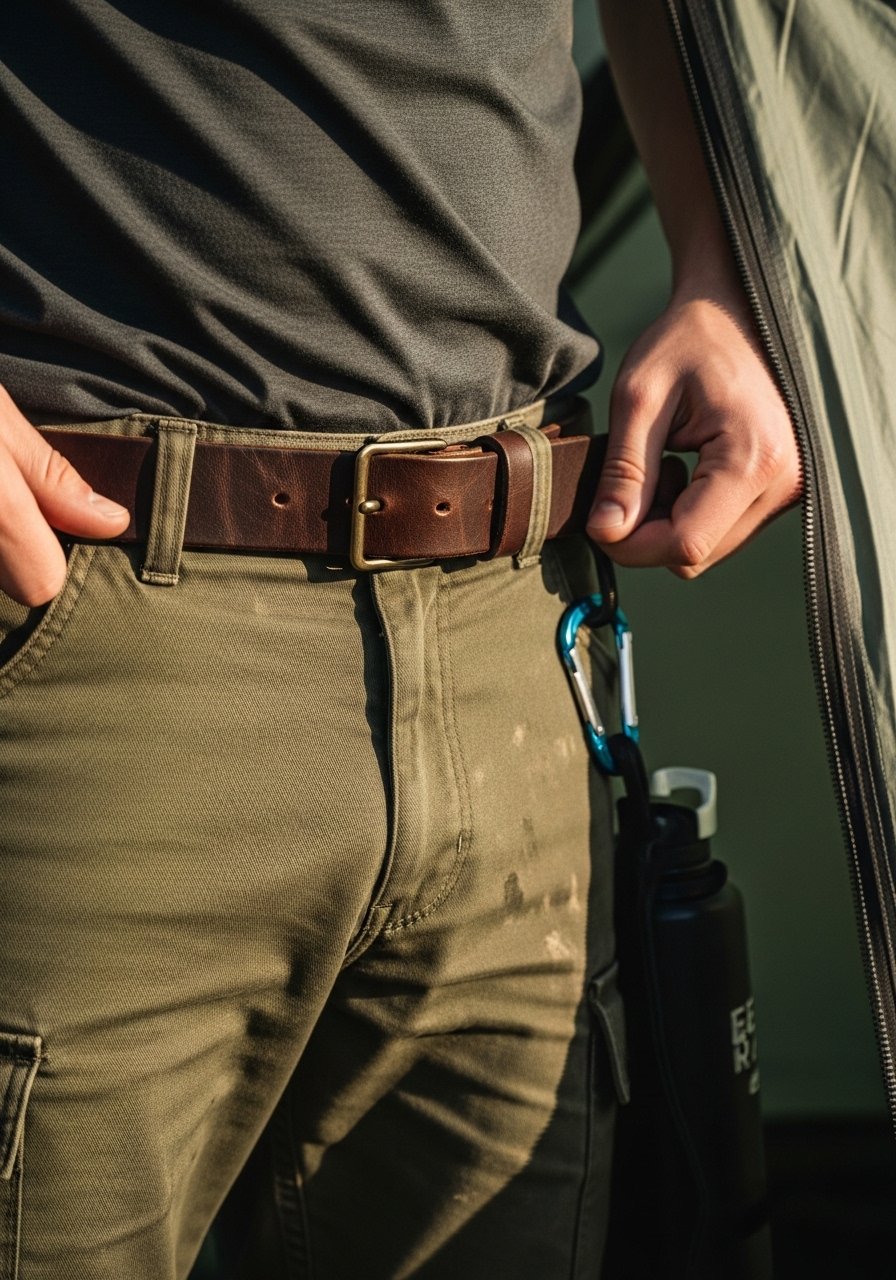
Next, I add a belt or watch. Belt cinches pants after meals; watch tracks time without phone pulls.
This stage adds utility—gear stays secure, you stay oriented.
Folks forget: too many layers snag zippers. Avoid dangling items; choose flat profiles.
Outfit feels secure, not fussy. Moves easy.
Step 4: Add a Personal Touch Last
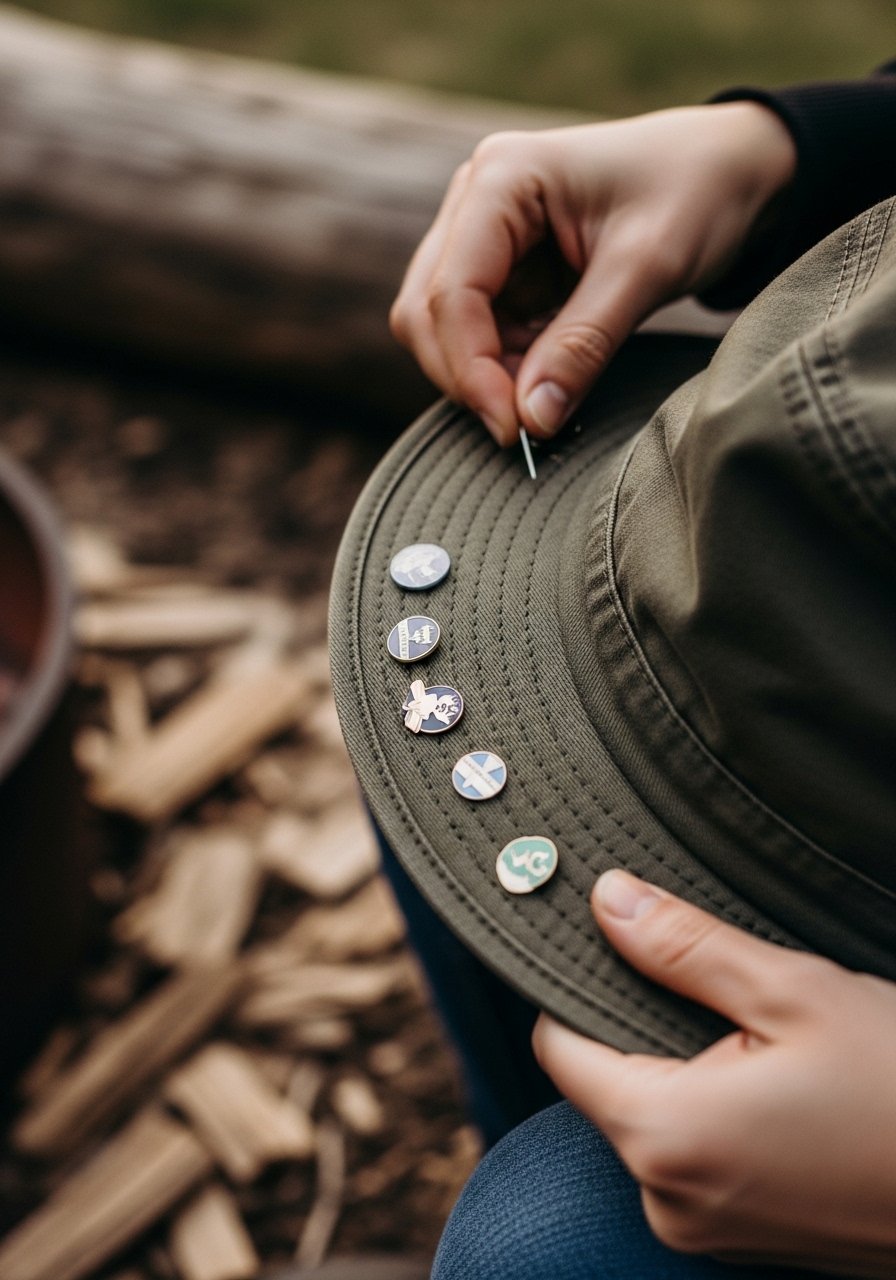
I finish with one small piece, like pins on my hat. It nods to me without excess.
Everything settles—looks intentional, stays light.
The insight: personal bits shine when basics hold. Skip if pack's tight.
Common error: over-personalizing early. Test: does it catch? Adjust down.
Full look lands comfortable, worth wearing all trip.
Step 5: Test and Tweak on the Move
I walk a loop around camp. Tug, sit, reach. Tweak what binds.
This confirms real comfort—hike-ready, sleep-easy.
People miss movement tests; static looks lie. Don't ignore snags mid-day.
One fix, and it's set. Calm for days ahead.
Common Mistakes to Avoid
I've made them all. Spot these early.
- Grabbing metal jewelry: It clinks, scratches, heats up fast.
- Ignoring pack friction: Straps wear thin fabrics quick.
- Color overload: Bright pops clash with nature tones.
Fix by checking twice before packing. Keeps things smooth.
Outfit Ideas for Weather Shifts
Mornings cool, afternoons warm. Swap easy.
Cool start:
- Beanie + buff over base shirt.
- Belt for wind.
Hot days:
- Hat + sunglasses.
- Bandana as headband.
Balanced every time. No repacks needed.
How to Pack Accessories Tight
Roll, don't fold. Use pouch clips.
- Bandana in pocket.
- Hat on top layer.
- Pins in tiny case.
Fits backpack side pocket. Grabs fast, stays organized.
Final Thoughts
Start with three pieces max next trip. Feel how less means more comfort.
You'll move freer, look right without trying.
It's the quiet confidence that sticks—outfits that just work.
Leave a Reply